Growing my own food… that sounds great, but can I do that while living in the Chicago suburbs? How can I grow fruits and vegetables here? What can I actually grow? When do I plant seeds or plants outside?
My family has been really into growing and eating fresh food for a long time. In fact, my grandpa was a produce guy- he handpicked fresh fruits and vegetables and delivered them to homes and businesses for a living. So I guess it makes sense that we have always had an interest in edible gardening, finding responsibly raised meats, and buying food as close to the source as possible. (You can also click here to read about our chickens.)
In this guide, you will find tons of tips for how to grow your own food, locally owned garden centers to buy supplies and consult with, and other resources to help along the way! We also included a method to teach young children how to be successful growing from seed.
How to Grow Your Own Food
Having a vegetable garden is definitely a learning process, but we are here to share our tips! We started with raised beds at my parents’ house, then I added an edible garden at our house. I have also been in charge of our elementary school’s gardens for a couple years now and have seen how excited and involved kids can get with gardening. One group of fifth graders had never tried celery before, but all wanted to take a big bite after harvesting it from the vegetable garden. Another group of second graders saw me pulling weeds during their lunch recess and asked if they could help instead of playing on the playground! They are overjoyed to help and don’t see it as a chore. Kids want to see where their food comes from. It’s satisfying for all ages!
Chicago Suburbs = Zone 5b
The Chicago suburbs is in what the USDA calls Zone 5b on their Hardiness Zone Map. This is determined by the average annual extreme minimum temperature and is important because not all gardening advice is equal. You can’t just Google “how to grow vegetables” and get advice from someone in California or even Ohio because not all climates are equal. The National Gardening Association has a great map with all of the zones in the United States where you can input your zip code and they will tell you what zone you are in. You can also look for yourself on the map.
Being in Zone 5b means that it’s not usually a good idea to start warm weather vegetables outside until around Mother’s Day. That’s when the chance of frost is significantly lower. However, that’s not to say that you can’t start anything before that- there is plenty to do! Here’s the timeline that we follow. Please know that these are not hard and fast dates. If you haven’t started yet, get some seeds growing inside now!
When to Plant Seeds
Note: Keep scrolling if you don’t want to start plants from seed. The growing guide continues with places to buy plants, when to plant outside, and more!
There are many more vegetables, fruits, and herbs that you can grow in the Chicago suburbs, but I put together some of the most popular choices that kids tend to like. If you have more ideas or questions, comment at the end of the this article!
Plants to grow from seed indoors in mid-March:
- Tomatoes
- Bell Peppers
- Celery
- Eggplant
- Onions
- Broccoli
- Kale
- Lettuce
- Herbs, such as parsley, basil, cilantro, sage, thyme, dill, rosemary, oregano
Plants to grow from seed indoors in mid-April:
- Cucumbers
- Pickling cucumbers
- Zucchini
- Melons, such as cantaloupe and watermelon
Why do two waves of planting indoors? We have found that vining plants grow so much faster than others and if you start them earlier they are ready to be planted outside when the temperatures aren’t warm enough yet.
Seeds to plant directly outside in mid-April:
- Carrots
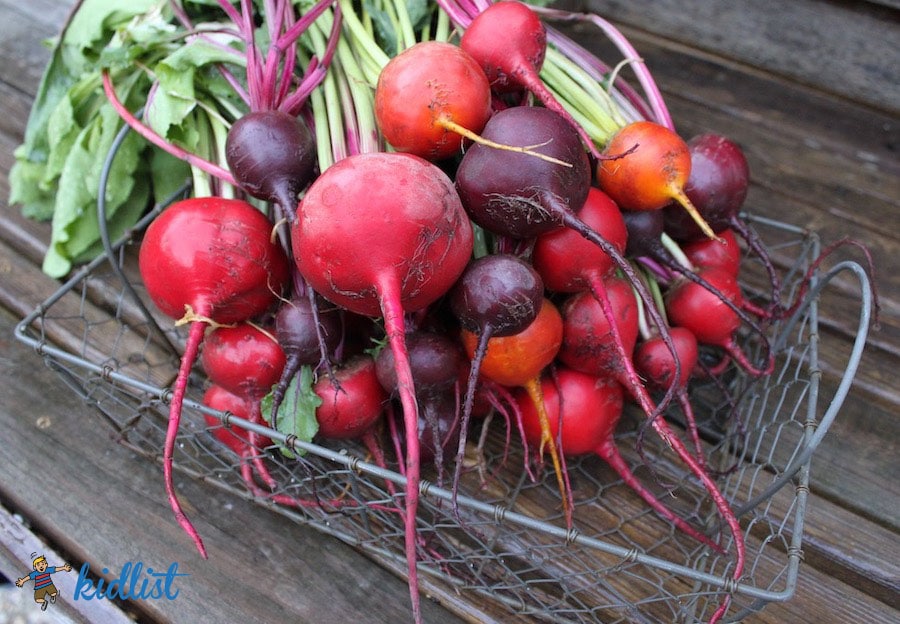
- Beets
- Radishes
- Sugar Snap Peas
- Green Beans
- Greens, such as lettuce, spinach, swiss chard, and kale
Plants to be cautious about:
- Pumpkins are fun to grow, but sprawl out way more than you think. You need a lot of room for these aggressive vines.
- I consider mint invasive and recommend growing it in a pot, not in the ground. In fact, once I left a pot of mint in my garden and the roots grew down through the hole in the bottom and sent out runners! It started growing in the garden and I had to pull it all out before it got out of control.
How to Grow Vegetable Plants from Seed
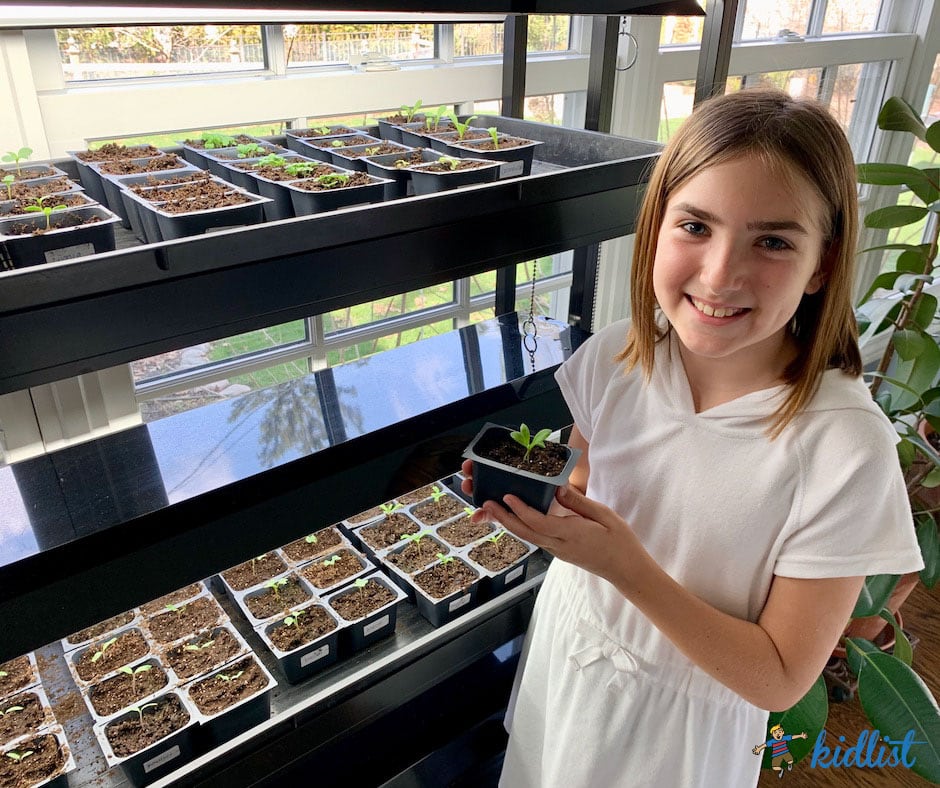
We recommend grow lights as they are fairly inexpensive and will give you more success. No use getting frustrated when gardening is supposed to be fun and fulfilling! I bought our two-foot wide grow lights from Costco and our elementary school garden has grow racks from Gardeners Supply Company. You can also put them in front of a sunny, south-facing window, but they won’t grow as fast and might get leggy.
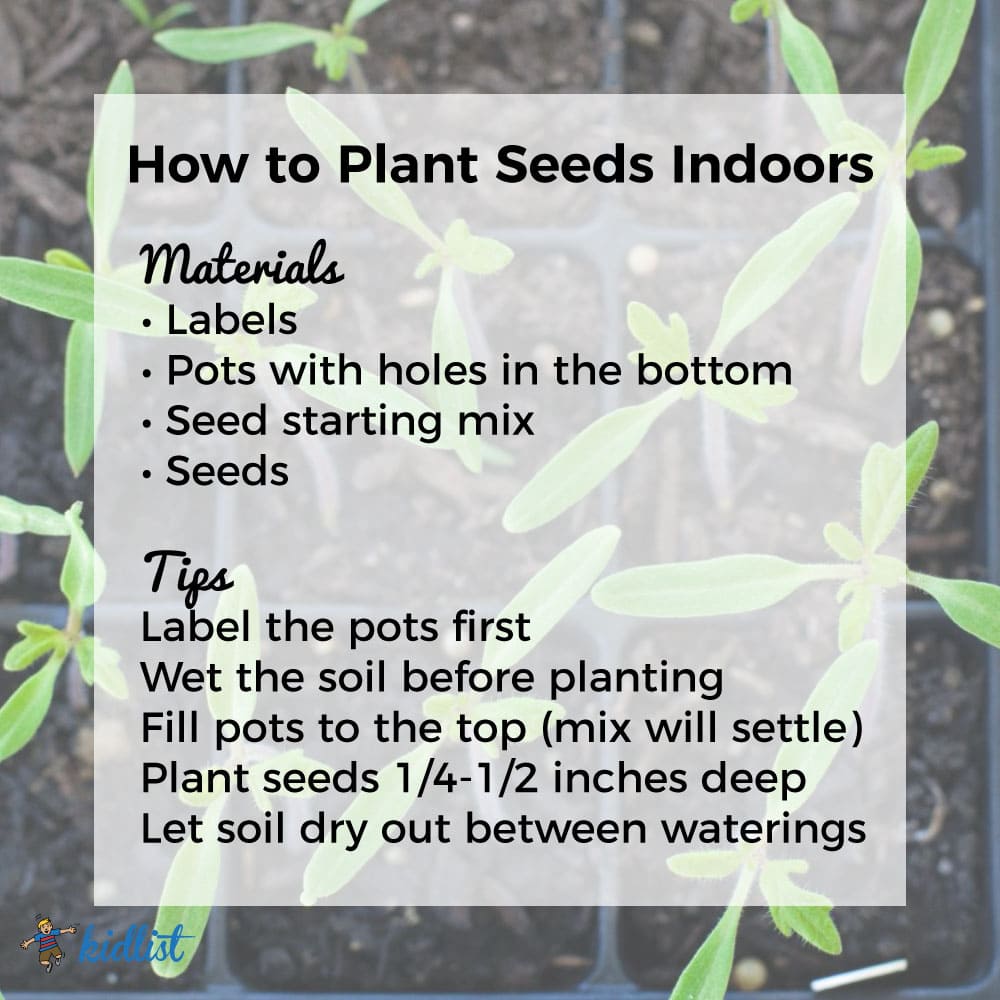
Besides grow lights, all you need to plant seeds indoors is labels, small pots with drainage holes, seed starting mix, and seeds.
- Label the pots first. We use mailing labels and write the plant name with pen so it doesn’t rub off. Sticking the labels on first is easier because after adding dirt and water the surface becomes dirty and the labels don’t stick. You can also use popsicle sticks to label each pot and hope your kids don’t rearrange them. haha
- Wet the seed starting mix before filling the pots with soil. If you pre-wet the mix subsequent waterings are easier and it gives the seeds a head start.
- Fill the pots to the top with the moist seed starting mix. You can lightly tap the soil down, but don’t compact it.
- Plant seeds about 1/4 inches below the surface. It works well if you make an indentation in the soil with your finger, drop two seeds in the hole, and cover it with the surrounding soil.
- Let the soil dry out between waterings. It doesn’t need to be bone dry, but it’s important that you don’t water if the soil is already wet to the touch. Not sure how to tell? Lightly press your finger on the soil in each pot. If the seed starting mix sticks to your finger, wait another day to water.
Position the grow lights about 2-3 inches above the plants. If the lights are too high, the plants will try to grow taller towards the light, which is called getting leggy. When seedlings get leggy, the stems are long and not as strong. It’s not the end of the world, but just something to be aware of and part of the learning process.
Thinning the Seedlings
Not every seed germinates, which is why it’s recommended to plant two seeds in each pot, but that also means that there’s a chance both seeds will sprout. That’s where thinning comes in. If two seedlings continue to grow next to each other in the pot, neither will grow well; they will be stunted.
You have to options: you can pull one of the seedlings out (the smaller/weaker-looking sprout) and throw it away, or you can carefully remove it by pulling both out, separating the roots, and replant both in separate pots. I usually go with the latter because I have a ridiculous time throwing away plants. It’s recommended that you thin soon after the plants sprout so the roots aren’t developed and intertwined.
How to Teach Kindergarteners to Plant Seeds in the Garden Outside
Every year the kindergarteners at our school plant root vegetables and greens in the garden to learn about tops and bottoms- what vegetables grow above ground and what vegetables grow below. We have adapted our method to planting seeds to make it easy for them to be successful with not only planting, but spacing as well.
For this method, you will need string, taffy apple sticks, (which are available at most grocery stores), hardware cloth (which has a grid pattern made of metal, is normally used for fencing, and can be found at hardware stores), duct tape, and seeds.
Cut the hardware cloth into squares measuring 1 ft x 1 ft. Cover the sharp edges by folding lengths of duct tape so it sticks to itself. Think of this grid as a map. Put arrows pointing to the square in the upper left corner to create a starting point for the kids. You are all set!
- String or mark off the area you are working in to divide it into one foot squares
- Position grid on the dirt in a square
- Put first stick where the arrows are pointing in the upper left hand corner
- Continue to put sticks in the squares of the grid depending on what vegetable you are planting (specified below)
- Remove grid, but not sticks
- Make hole with stick about 1/2 inch deep
- Drop 2 seeds in each hole
- Cover the seed with dirt
- Put a flag in the stringed square you just finished to indicate it’s complete
Carrots, radishes: 4 squares between seeds (plant two seeds in the first square, count over 4 squares, plant two seeds in the fifth square)
Beets, swiss chard, lettuce, spinach: 7 squares between seeds
Edible Perennials
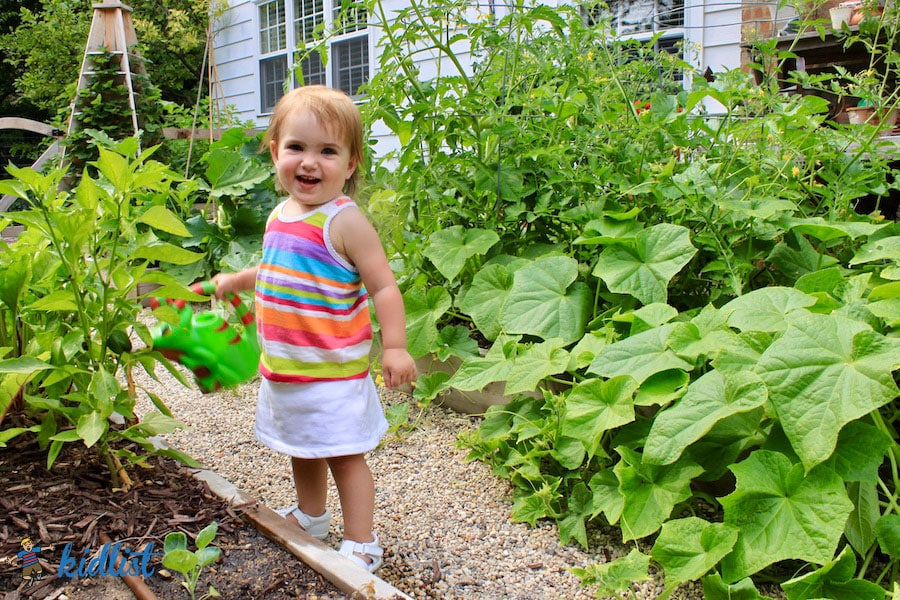
There are also edible perennials, which are plants that come back every year! Buy strawberry, raspberry, rhubarb, chives, and asparagus plants to plant outside in May or June to invest in the future of your edible garden.
Fruit Trees
I am also really into learning how to grow fruit and have a pear tree, peach tree, two apple trees, grape vines, and several blueberry bushes. It takes years for fruit trees to establish and start producing fruit, but it is really satisfying when they do!
If you are interested in starting a little backyard orchard, check out the Stark Bro’s catalog (so many amazing varieties to choose from) and join the local fruit growers group called Midwest Fruit Growers (MidFEx). There are so many knowledgable people in the group and they even have gatherings to learn from experts and each other.
Not interested in growing plants from seed?
No problem! We have amazing local garden centers that have tons of plants to choose from!
Independently-Owned Garden Stores
We like supporting the local garden centers. They know what they are talking about and are there to help! The following independently-owned stores carry vegetable plants, herbs, and more.
Wannemaker’s Home and Garden
1940 Ogden Avenue
Downers Grove, IL 60515
(630) 852-0700
Currently open from 9:00 am – 2:00 pm for in-store purchases and curbside pick-up.
Luurs Garden Center
5200 Butterfield Road
Hillside, IL 60162
(708) 449-5208
Currently offering curbside pick-up and delivery.
Vern Goers Greenhouse
5620 S Oak Street
Hinsdale, IL 60521
(630) 323-1085
Open for curbside pick-up and delivery Monday-Saturday from 8:00 am – 5:00 pm.
Hinsdale Nurseries
7200 S Madison Street
Willowbrook, IL 60527
(630) 323-1411
They are open Monday-Friday from 9:00 am – 3:00 pm for curbside pick-up only.
Platt Hill Nursery
222 W Lake Street
Bloomingdale, IL 60108
(630) 529-9394
They are offering online shopping with delivery or next day curbside pick-up.
The Growing Place Garden Center
25w471 Plank Road, Naperville: (630) 355-4000
2000 Montgomery Road, Aurora: (630) 820-8088
The Aurora location is currently offering drive-thru shopping on Tuesdays, Wednesday, Fridays, Saturdays, & Sundays (closed on Mondays and Thursdays) from 10:00 am – 3:00 pm. You drive through the parking lot, point to what you would like to buy, and their staff will load it in your trunk and you can handle payment without leaving your car.
Lizzy’s Garden
24254 111th Street
Naperville, IL 60564
(630) 904-1066
Their greenhouses are open for curbside pick-up Monday-Saturday from 9:00 am – 5:00 pm.
When to Plant Vegetables Outside
Hardening Off
An important aspect of growing plants from seed indoors is acclimating them to the sun, wind, and temperature outside. This is called hardening off. The typical method takes about a week. On day 1, you take the plants outside in a shady spot for two hours during the hottest part of the day, then bring them back inside. Day 2, leave them outside for four hours. Day 3, six hours, and so on. As time goes on, expose them to part sun, then full sun by the end. If you don’t harden the plants off, it is highly likely that the leaves will burn and the plants could die from the shock.
There is another method, which is leaving them outside all day right from the start against the north side of your house or shed on a warm, overcast day. The idea behind this method is that the plants will be in shade the entire day and will become acclimated faster- about three days instead of five to seven.
You can tell when the vegetable plants are hardened off because the leaves will become thicker and will appear stronger. It’s debatable if a beginner can tell the difference, so I always err on the cautious side- harden them off for a full week and call it good.
Time to Plant Outside!
We always plan to plant our vegetables, herbs, and fruit plants the week after Mother’s Day. However, it’s always good to look at the weather. As long as the temperatures will not be dipping down to the 30’s overnight, you are good to go.
Plant Spacing
For vegetable plant spacing, we like the square foot gardening method. It’s a foolproof way to make the best use of your space. Even if you have a small space for your vegetable garden, you can still have tons of food to harvest!
For example, zucchini needs a four foot space to grow, tomatoes need two feet, broccoli needs one foot, and onions need six inches between plants to adequately grow. The example below shows four different boxes, which are each four foot square.
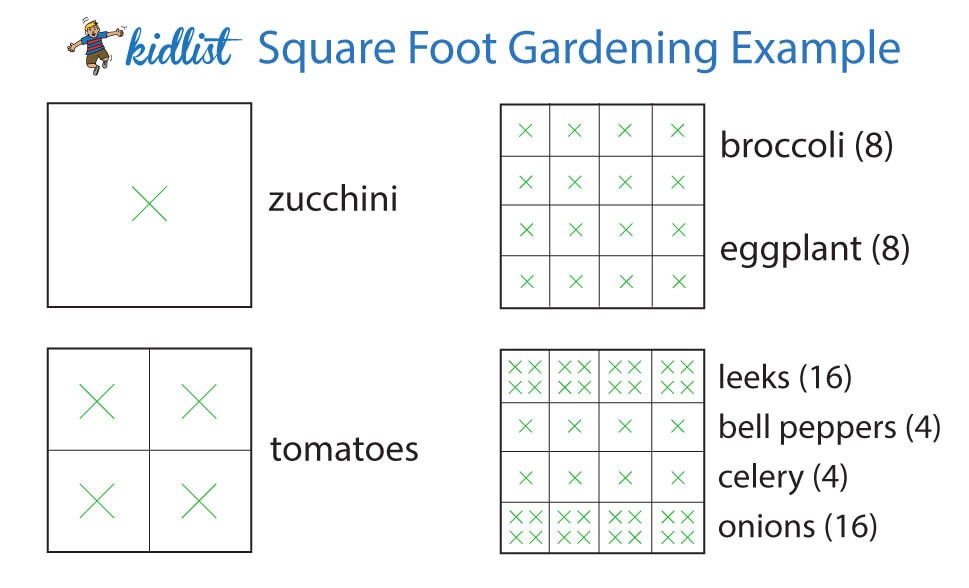
You can also read more about square foot gardening with tips on BackYard54.com.
The Best Way to Plant Green Beans
My dad has mastered the art of succession planting. Succession planting is staggering seed planting so you always have a harvest, which works perfectly for green beans. This method also works for other vegetables such as carrots, beets, and radishes, however we find that root vegetables store longer so it’s not as crucial to space out planting and harvesting.
Week one, plant one row of green bean seeds. Wait two weeks, then on week three, plant the second row of beans. Week five, plant another row, etc. The plants will mature and produce beans at different times, providing an everlasting harvest for you!
Helpful Resources for Gardening Questions
The University of Illinois Extension has been incredibly helpful to me throughout the years. They have resources for just about every type of plant that exists! Their help and programs are free of charge and you can head to their website to find an office near you and call or email a local expert.
There are a few local Facebook gardening groups that you can join:
- Garden Diggers: Chicago’s Western Burbs Garden Party!
- Chicagoland Gardening and Homesteading
- Illinois Gardening (this one is all of Illinois, so some of the posts are not as relevant to Chicagoland)
The Western Springs Garden Club is one of the biggest garden clubs in the area and is membership based. They have regular meetings where you can learn about different topics relating to gardening and there are so many members with great advice. Other local gardening clubs include the Downers Grove Organic Gardeners, Brookfield Garden Club, and Wheaton Garden Club.
Don’t forget about the local garden centers too! They are very knowledgable and usually have gardens of their own. Ask for someone that knows about vegetable gardens or edible gardening.
If you have any questions or something to add, feel free to comment below!
You also might be interested in Where to Buy Meat, Produce, and Eggs from Local Farms. Find a farm that accepts custom orders and delivers to a suburb near you!






1 Comment. Leave new
There is a great CSA in Naperville. They have lots of option as far as shares and have a number of pick up areas in the western suburbs.
The Conservation Foundation/Green Earth Harvest
10S404 Knoch Knolls Rd
Naperville, IL 60565